In this lab, you will:
- Setup
git - Create a private homework repository on Github
- Create an
info.rfile
You will need:
- A Github educational account
- If you are using your own laptop, please install relevant software
Setup git
You will be using git to submit every lab assignment for grading.
git is an extremely powerful version control system widely used in the
open source scientific computing community. Rather than trying to learn
everything that you can about git right away, you will only be learning
the things you need to immediately use. Over the next several weeks, you
will incrementally learn how to use more of its features.
git commands are run through a shell prompt. You can interact with shell prompts
via Terminal (on OSX) or Git Bash (on Windows). If you are using OSX,
Terminal comes pre-installed. If you are using Windows, you will need to install
Git bash by following the instructions here. Entering git
at a shell prompt, will produce output something like this (try this on your own
computer):
$ git
usage: git <command> [<args>]

The most commonly used git commands are:
   add        Add file contents to the index
   config     Get and set repository or global options
   clone      Clone a repository into a new directory
   commit     Record changes to the repository
   log        Show commit logs
   push       Update remote refs along with associated objects
   status     Show the working tree status

'git help -a' and 'git help -g' lists available subcommands and some
concept guides. See 'git help <command>' or 'git help <concept>'
to read about a specific subcommand or concept.
When you try this on your computer, you will see much more information. I've reduced the output so that it only contains information relevant for today's lab.
The first thing you need to do is configure git. Here is what
I did on my machine, you should use your own name and email address!
git config --global user.name "Karl Kumbier"
git config --global user.email "kkumbier@berkeley.edu"
Create a private homework repository on Github
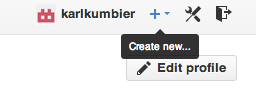
Make sure you are logged onto Github. In your user bar at the top right of any Github page, click the "Create a New Repo" button:
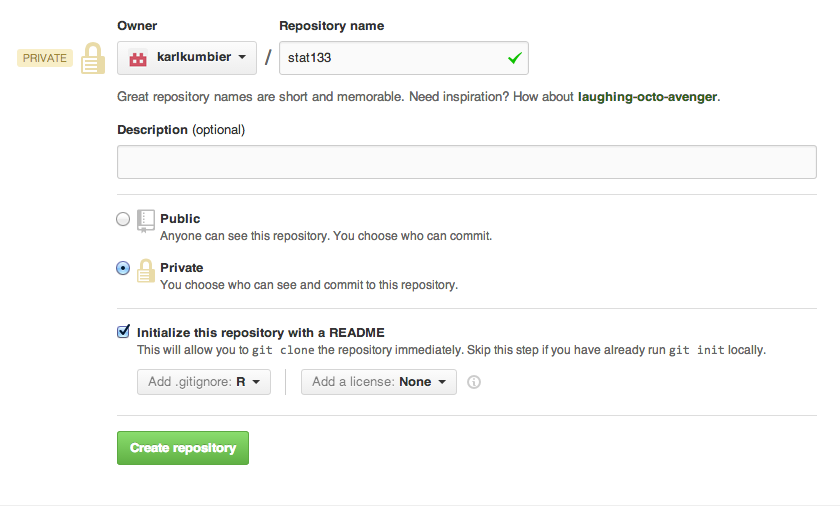
This will take you to a new page where you will:
- Name your repository "stat133"
- Make sure it is private
- Select "Initialize this repository with a README"
- Choose "R" in the pull-down menu to add a .gitignore file
Your screen should look like this (except karlkumbier will
be replaced by your Github name):
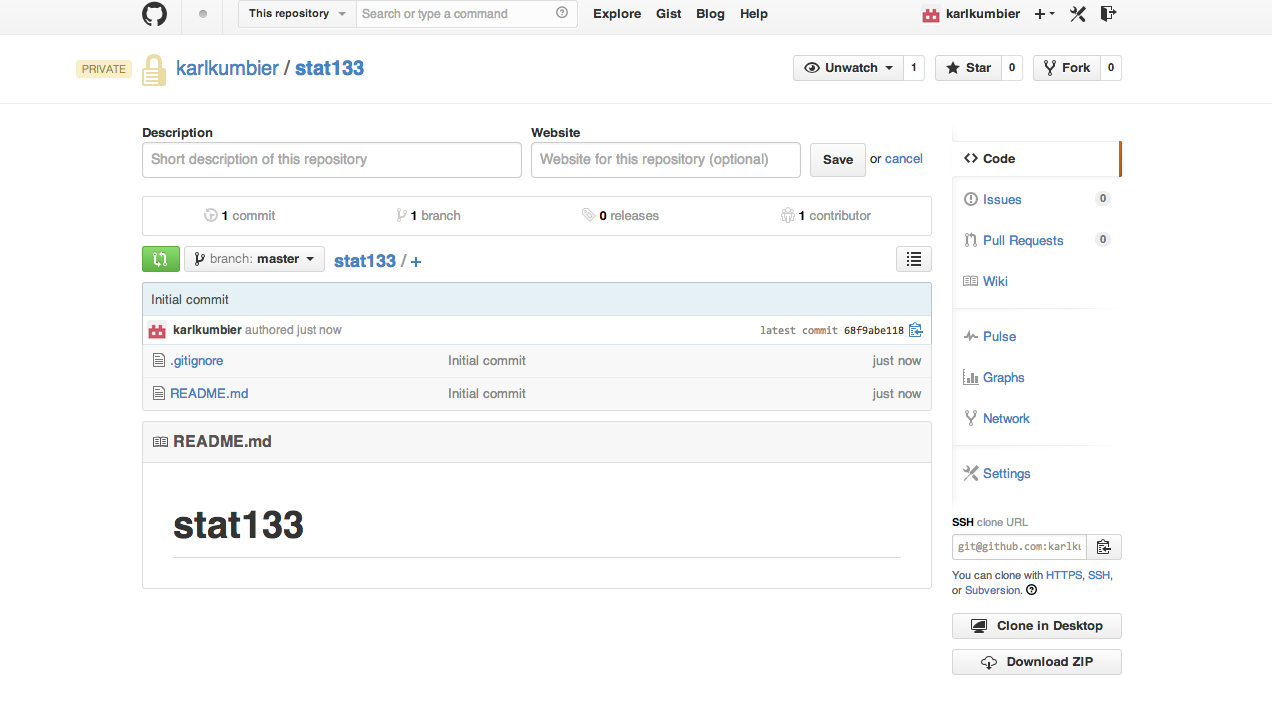
Once you click the "Create repository" button, you should see a page like this:
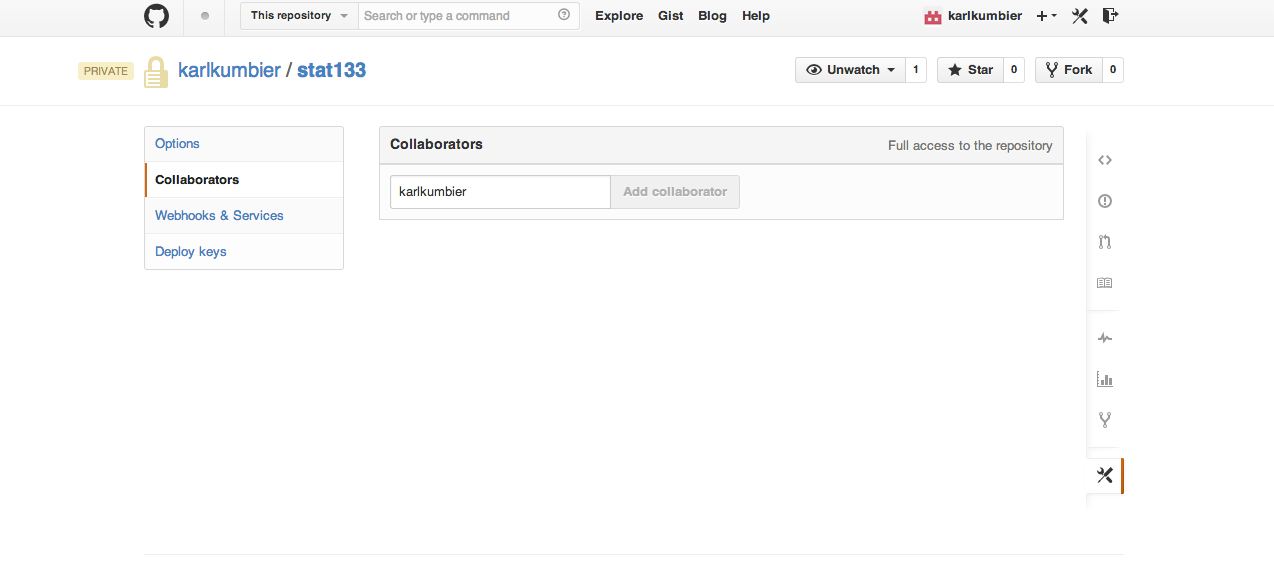
In order for me to see (and grade) your private repository, you will
need to add me as a colloborator. In the lower right-hand corner of
your repositories main page, you should see a button labelled
"Settings". Click on the "Settings" button will take you to
a page where you can edit various settings for your repository.
Choose the "Collaborators" button on the "Settings" page and
add me, karlkumbier, as well as the instructor ingileif,
andjarrodmillman (developer).
Clone repository to your local machine
First you will create a src subdirectory in your home directory. Then you
will clone your repo inside of the src subdirectory. Please make sure to
use your own Github username instead of mine. Running the following commands at
a shell prompt will create a new directory src inside your home directory
and clone the repository you just created on Github to your machine:
$ cd            # go to your home directory
$ mkdir src     # make a source subdirectory
$ cd src
$ git clone https://github.com/karlkumbier/stat133.git
Cloning into 'stat133'...
Username for 'https://github.com': karlkumbier
Password for 'https://karlkumbier@github.com':
remote: Counting objects: 4, done.
remote: Compressing objects: 100% (3/3), done.
remote: Total 4 (delta 0), reused 0 (delta 0)
Unpacking objects: 100% (4/4), done.
Checking connectivity... done.
Now take a look at what is inside your repo:
$ cd stat133/
$ ls
README.md
$ ls -a
.  ..  .git  .gitignore  README.md
Create an info.r file
Now that you have a local copy of your repo, you will need to add some new content.
First, make sure you are in the top-level directory of your newly cloned repository (note: you will be in the correct location if you haven't changed directories since entering the above commands):
pwd
If you aren't in the correct directory, you need to change your working directory:
cd ~/src/stat133
Open your text editor and create a new file, called info.r. If you are
using RStudio, you should create this file in the text editor window (upper left
by default) and save it to your newly cloned stat133 directory. Add the
following content (make sure to replace the information I have supplied WITH
YOUR OWN INFO:
name = "Karl Kumbier"
SID = "0123456789"
email = "name@berkeley.edu"
github_name = "karlkumbier"
status = "enrolled"
Note: status in ('enrolled', 'audit')
Next you will query the status of your git repo:
$ git status
On branch master
Your branch is up-to-date with 'origin/master'.

Untracked files:
  (use "git add <file>..." to include in what will be committed)

        info.R

nothing added to commit but untracked files present (use "git add" to track)
As you should see, git tells you that there is a new file that is not
being tracked. Following the advice, try adding your new file to the repo:
git add info.r
Now check on the status of your repo again:
$ git status
On branch master
Your branch is up-to-date with 'origin/master'.

Changes to be committed:
  (use "git reset HEAD <file>..." to unstage)

        new file:   info.r
Everything looks good, so go ahead and commit your change:
$ git commit -m "Add personal info"
[master bbc329f] Add personal info
 1 file changed, 4 insertions(+)
 create mode 100644 info.r
Next take a look at a log of what's been done:
$ git log
commit bbc329fe5f0672582a3ad3c70f5b86f4acc15f63
Author: Karl Kumbier <kkumbier@berkeley.edu>
Date:   Wed Jan 29 14:19:38 2014 -0800

    Add personal info

commit dead6f41c65e50f444760653205e21083caabfcc
Author: Karl Kumbier <kkumbier@berkeley.edu>
Date:   Tue Jan 28 22:29:33 2014 -0800

    Initial commit
At this point you've created a new file, added it to your repo, and committed the current state of your repo. This was all done locally, so the next thing to do is push these changes back up to your remote Github repo:
$ git push
Username for 'https://github.com': karlkumbier
Password for 'https://karlkumbier@github.com':
Counting objects: 4, done.
Delta compression using up to 4 threads.
Compressing objects: 100% (3/3), done.
Writing objects: 100% (3/3), 359 bytes | 0 bytes/s, done.
Total 3 (delta 1), reused 0 (delta 0)
To https://github.com/karlkumbier/stat133
   dead6f4..bbc329f  master -> master
At this point, your Github repository main page should look something like this:
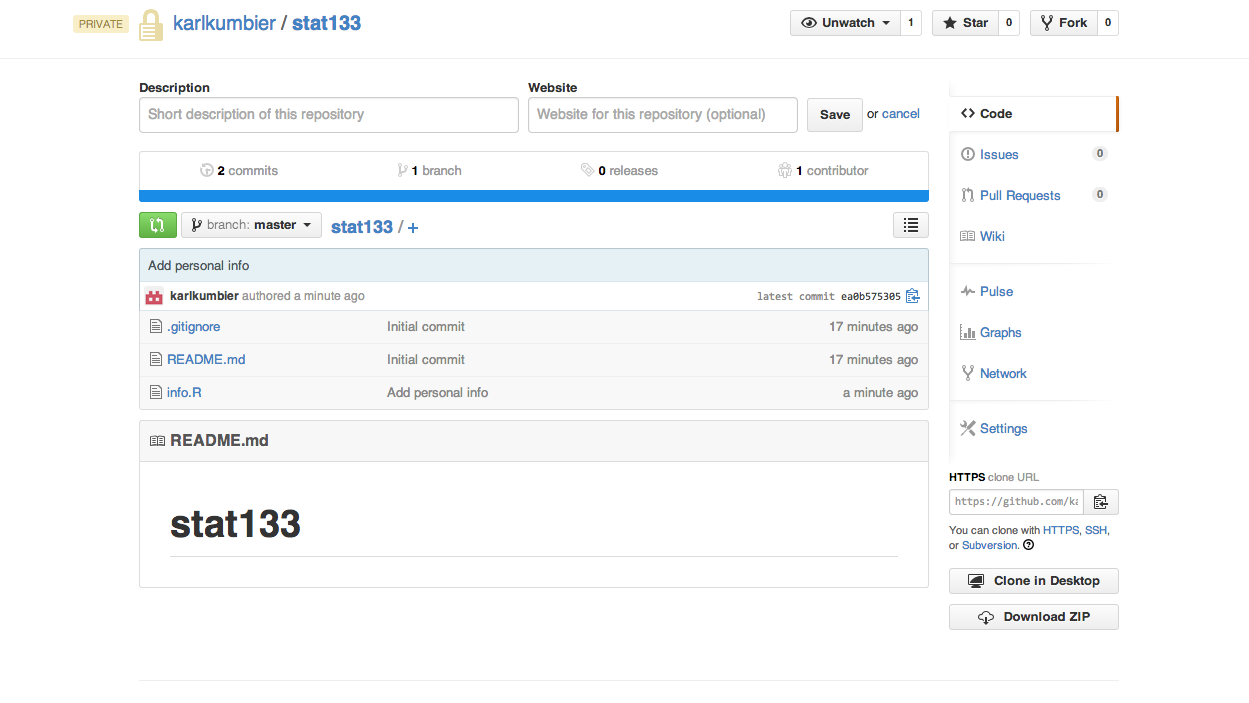
Note that there is now a new file and the number of commits has been incremented to 2.